 Chobial
Shoot, develop, make film.
Twelve short tutorials, from your first frame to your own film on a friend's phone.
1 · Your first roll
Chobial is a camera that develops like film. The first time you open it, a short welcome explains the idea and asks for two permissions: Camera (required) and Photos (optional — add-only, used when you save).
- Tap the film in the bottom-right corner. A strip of films slides up; pick one. The viewfinder develops with it, live — what you see is the look you'll get.
- Touch and hold the viewfinder to peek without the film — the tag says WITHOUT FILM.
- Press the shutter — or Camera Control, or a volume button. Hold the shutter for a burst.
Chobial always captures RAW. On a Pro iPhone (12 Pro or later) you can choose ProRAW or plain RAW from the format pill, or in Settings › Use ProRAW. Other iPhones capture RAW.
Want each shot in Photos straight away? Under After Capture, turn on Save to Photos (developed with the loaded film), and Attach RAW File if you want the negative alongside it.
2 · Develop it again
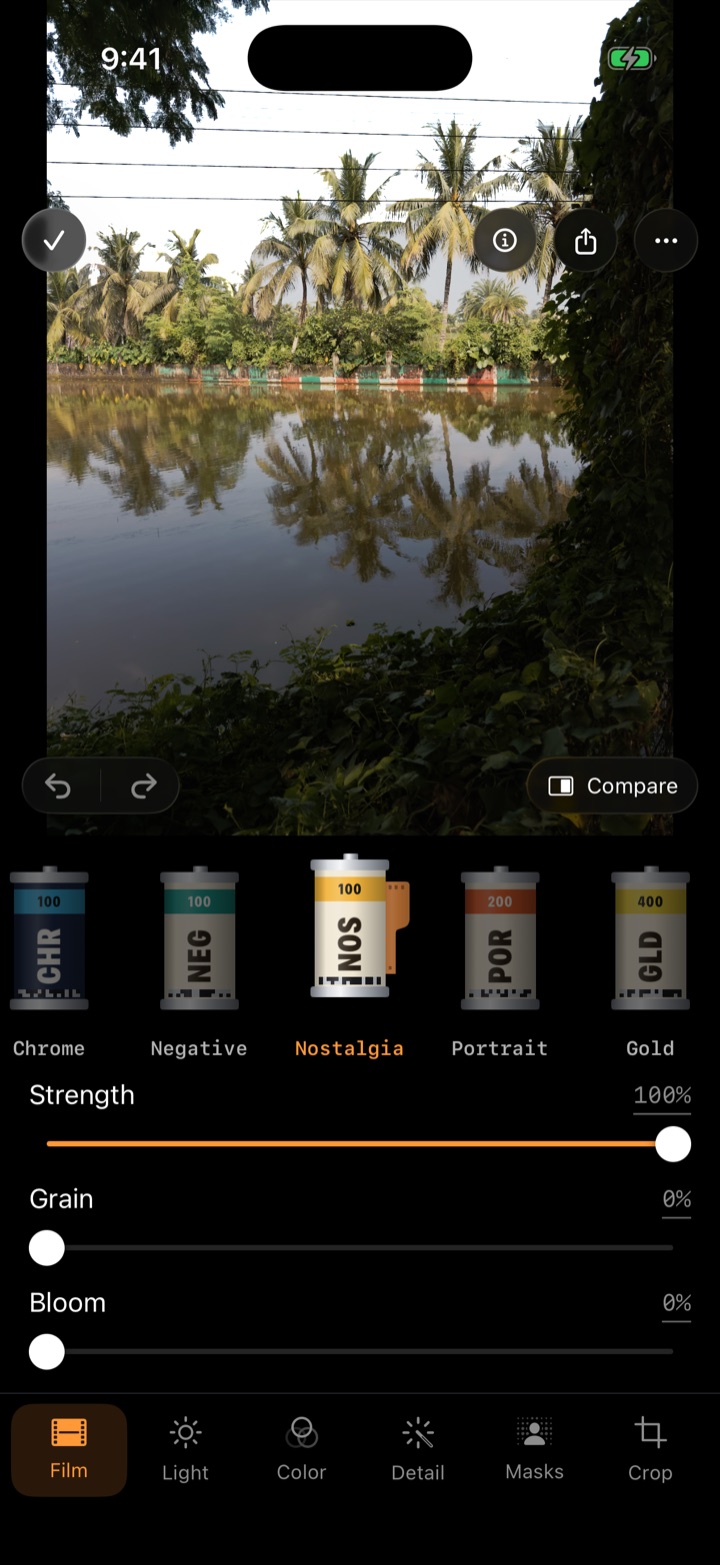
Nothing is baked in. Every photo stays a RAW negative, and the film is just how it's developed right now.
- Open the Library and tap a photo.
- Open the editor and choose the Film tool.
- Scroll the cassettes and tap one. The photo re-develops from the RAW data.
- Use Strength to dial the film back toward a clean develop, and add Grain, Bloom or Fade for this photo.
- Hold Compare (bottom right) to see the photo before any edits, or hold a tool's tab to see it without that tool's changes.
This works on photos from years ago with films you make today.
3 · Make your own film
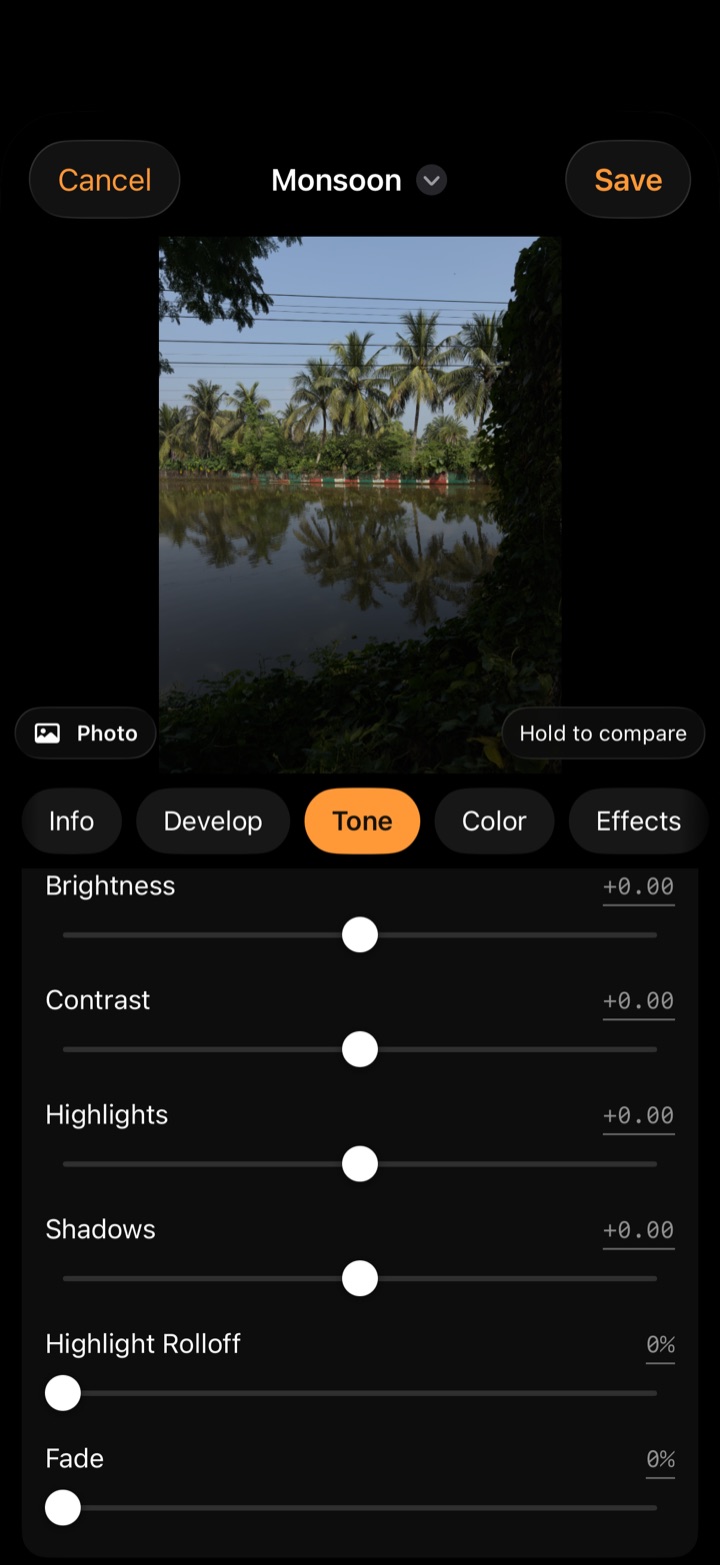
- Open Films: hold the film on the camera, or go to Settings › Manage Films. Tap + › New Film. (Built-in films can't be changed, but a new film started from one can.)
- Info: name it, add a comment, and give it a three-letter cassette code.
- Develop: the RAW develop underneath the look.
- Tone: brightness, contrast, highlights, shadows, highlight rolloff, fade — and curves.
- Color: saturation, vibrance, an 8-band colour mixer, split toning, a channel mixer, or Monochrome with colour filters.
- Effects: grain, halation, bloom and vignette.
- LUT: build on a
.cubefile (see tutorial 5). - Tap Save. Your film is now in the camera's strip and the editor.
The preview is a real photo from your library. Hold the preview to compare with how the film started. To change a film later, tap its ••• button, then Edit.
Grain that behaves like film
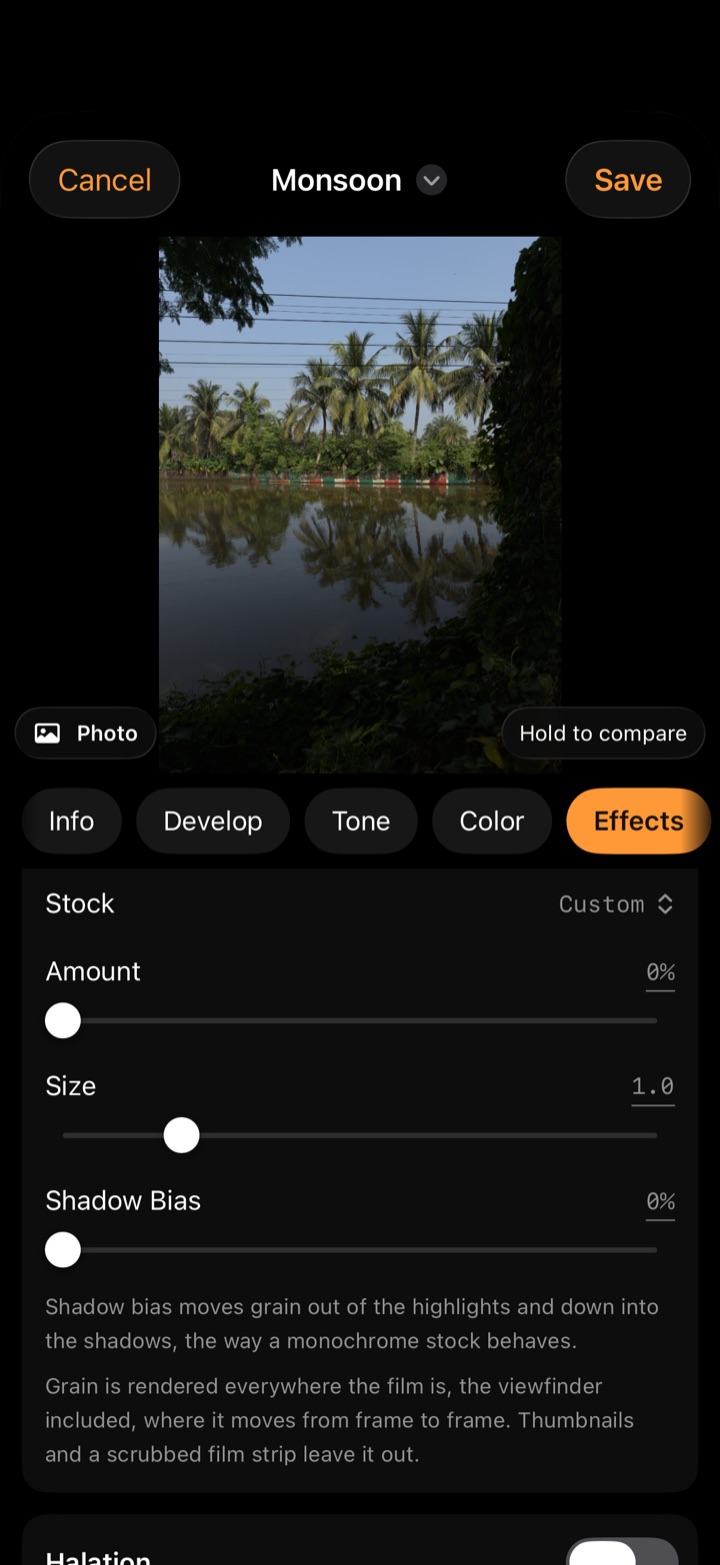
Pick a grain Stock, then set Amount and Size. Shadow Bias moves grain out of the highlights and down into the shadows, the way a real monochrome stock behaves.
Halation adds the warm glow around bright edges that film gets from light bouncing back through the emulsion. A little goes a long way.
Use Reorder in Films to choose the order films appear in the strip and on Camera Control.
4 · Share a film
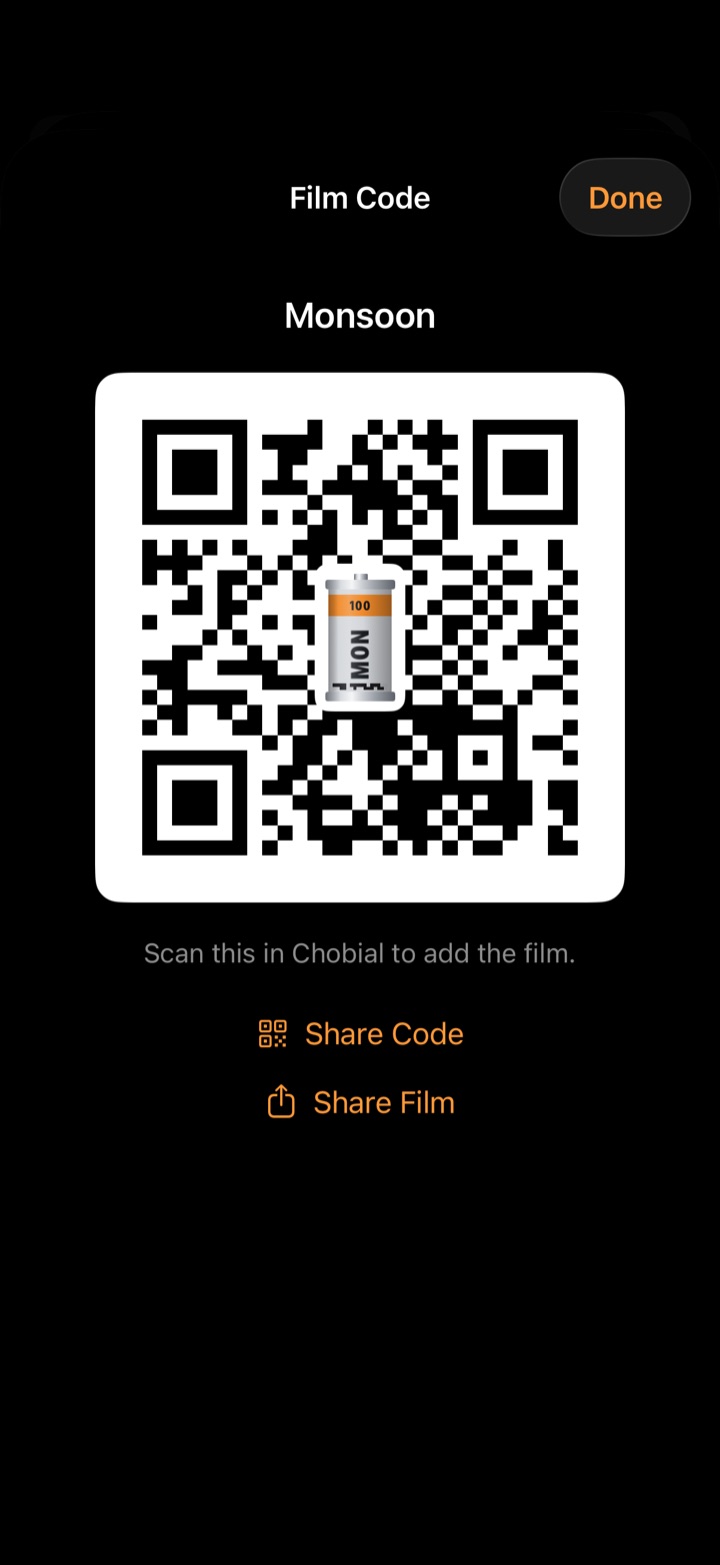
Films you make can travel. In Films, tap ••• on one of your films and choose:
- Film Code — a QR code with your film's cassette in the middle. Anyone with Chobial can scan it straight off your screen.
- Share Code — send that code as an image card, ready to post.
- Share Film — a
.chobialfile for Messages, Mail or AirDrop. Tapping it opens Chobial, which asks before adding it.
Receiving a film
In Films, tap + › Scan Film Code and point at the code. If the code is in a picture — a screenshot of someone's post — use Scan from a Picture. Check the name and tap Add to My Films.
Proud of one? Submit to Chobial sends it in. The best films ship inside the app, credited to you.
5 · Work with .cube LUTs
- Save the
.cubefile to Files. - In Films, tap + › Import Recipe or LUT… and pick it.
- Chobial makes a new film on top of it. Open it and use the LUT section, then adjust tone, colour and grain on top — the LUT is one stage of the film, not the whole of it.
Going the other way: tap ••• on one of your films and choose Export Color LUT to use your look in Lightroom, Resolve, Final Cut and other apps.
6 · Manual controls
Chobial starts in P (program). Tap the mode to change it:
| Mode | You set | Chobial sets |
|---|---|---|
| P | Exposure compensation | Shutter and ISO |
| S | Shutter speed | ISO |
| ISO | ISO | Shutter speed |
| M | Both | Nothing |
- EXP — exposure compensation in third stops.
- FOCUS — manual focus from NEAR to ∞, with a loupe and Focus Peaking to show what's sharp. Or tap a person or pet and focus and exposure follow them.
- WB — Auto, Daylight, Cloudy, Shade, Tungsten, Fluorescent, or Kelvin from 2500 to 10000 K. For exact colour, use GREY CARD: point at something neutral grey and tap.
- DISP — turn on Grid, Level, Histogram and Zebra. Zebra stripes mark highlights past the threshold set in Settings › Clipping Threshold.
7 · Masks
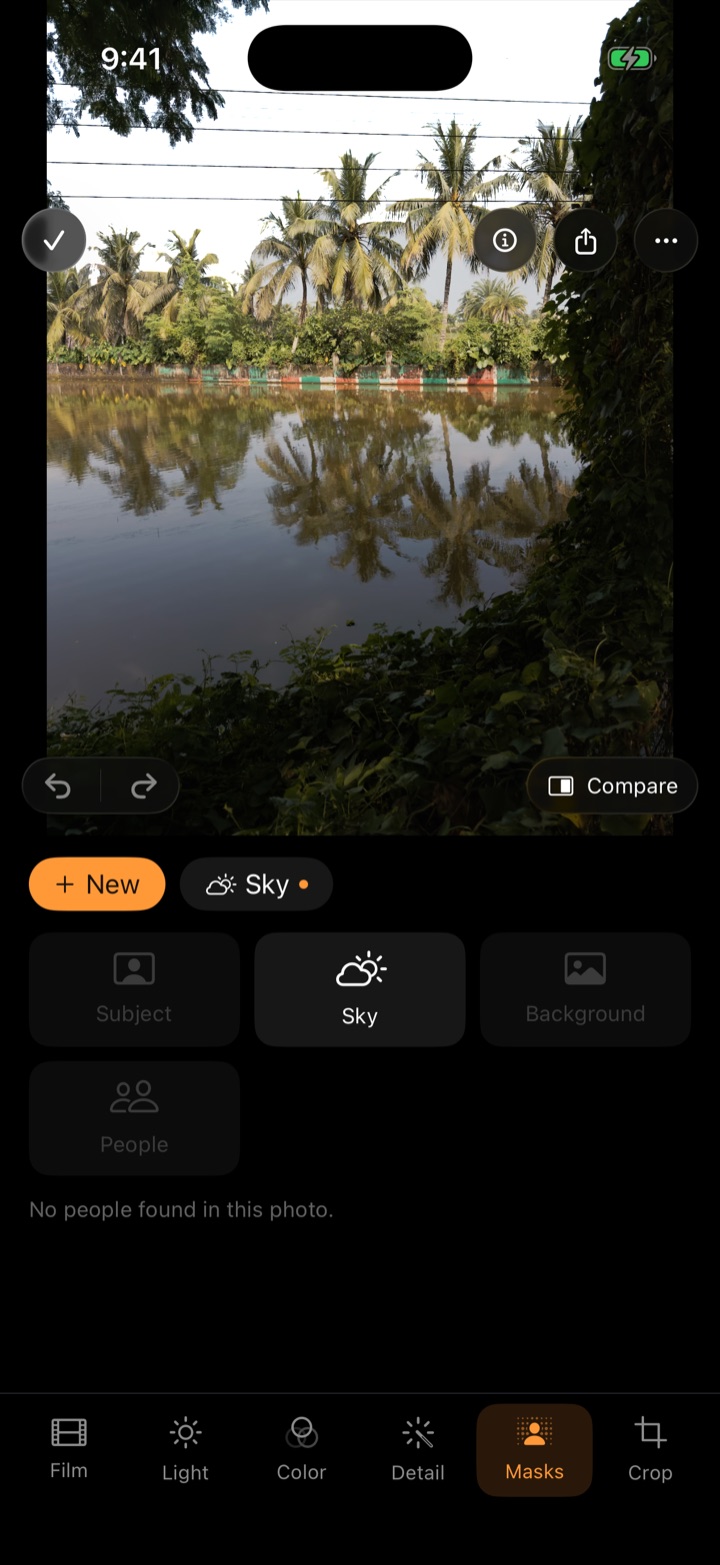
- In the editor, open the Masks tool and tap + New.
- Pick Subject, Sky, Background, People, or one person or face. Chobial finds it for you.
- Adjust the mask's own exposure, contrast, highlights, shadows, colour, clarity and dehaze.
- Invert the selection, or Add and Subtract others to refine it. Tap the eye to show the selection in red, and the power button to switch the mask off and on.
A classic: a Sky mask with highlights down and a touch of dehaze, and a Subject mask with shadows lifted.
8 · Develop other cameras' RAW
Chobial is a darkroom for your other cameras too. In the Library, tap Import RAW and pick DNG files or camera RAW — Fujifilm RAF, Sony ARW, Canon CR2/CR3, Nikon NEF, Panasonic RW2, Olympus, Leica, Pentax, Hasselblad and others that iOS can read. They join your library and develop with any film.
Your negatives live in Files › On My iPhone › Chobial › Captures, where you can back them up or move them to a computer.
9 · Export
From a photo, choose export:
- Save JPEG or Save HEIC — developed with the film and your edits, at full resolution. The menu shows the exact pixel dimensions before you save.
- Save RAW — the original DNG.
For many at once: in the Library tap Select, choose photos, then Export.
10 · Camera Control & Lock Screen
On iPhones with Camera Control:
- Click to take a photo.
- Light-press to choose Film, Exposure, ISO or Shutter, then slide to change it.
To shoot without unlocking, choose Chobial in iOS Settings › Camera › Camera Control, or add the Chobial control to the Lock Screen or Control Center. The locked camera offers the built-in films; the photos join your library next time you open the app.
Siri and Shortcuts: say “Take a photo with Chobial”, “Shoot Chrome with Chobial” or “Load Gold in Chobial”. The Take Photo and Open Camera actions are in the Shortcuts app.
11 · Apple Watch
Open Chobial on your iPhone, then open it on your watch. Three pages:
- Shutter (the middle page) — a remote shutter with a small framing preview and a 3 or 10 second timer. Perfect for group shots and long exposures on a tripod.
- Films (one page left) — load a film on the phone from your wrist.
- Recents (one page right) — your last few shots.
The preview is a framing aid, not a full viewfinder, and the iPhone needs Chobial open on screen.
12 · iCloud
Settings › Sync Films & Settings is on by default when you're signed in to iCloud. Your films, their order, the loaded film, and your viewfinder and saving preferences follow you to every iPhone signed in to the same Apple Account. Photos themselves are not synced — they stay on the phone that took them.
Still stuck? Visit support or email [email protected].